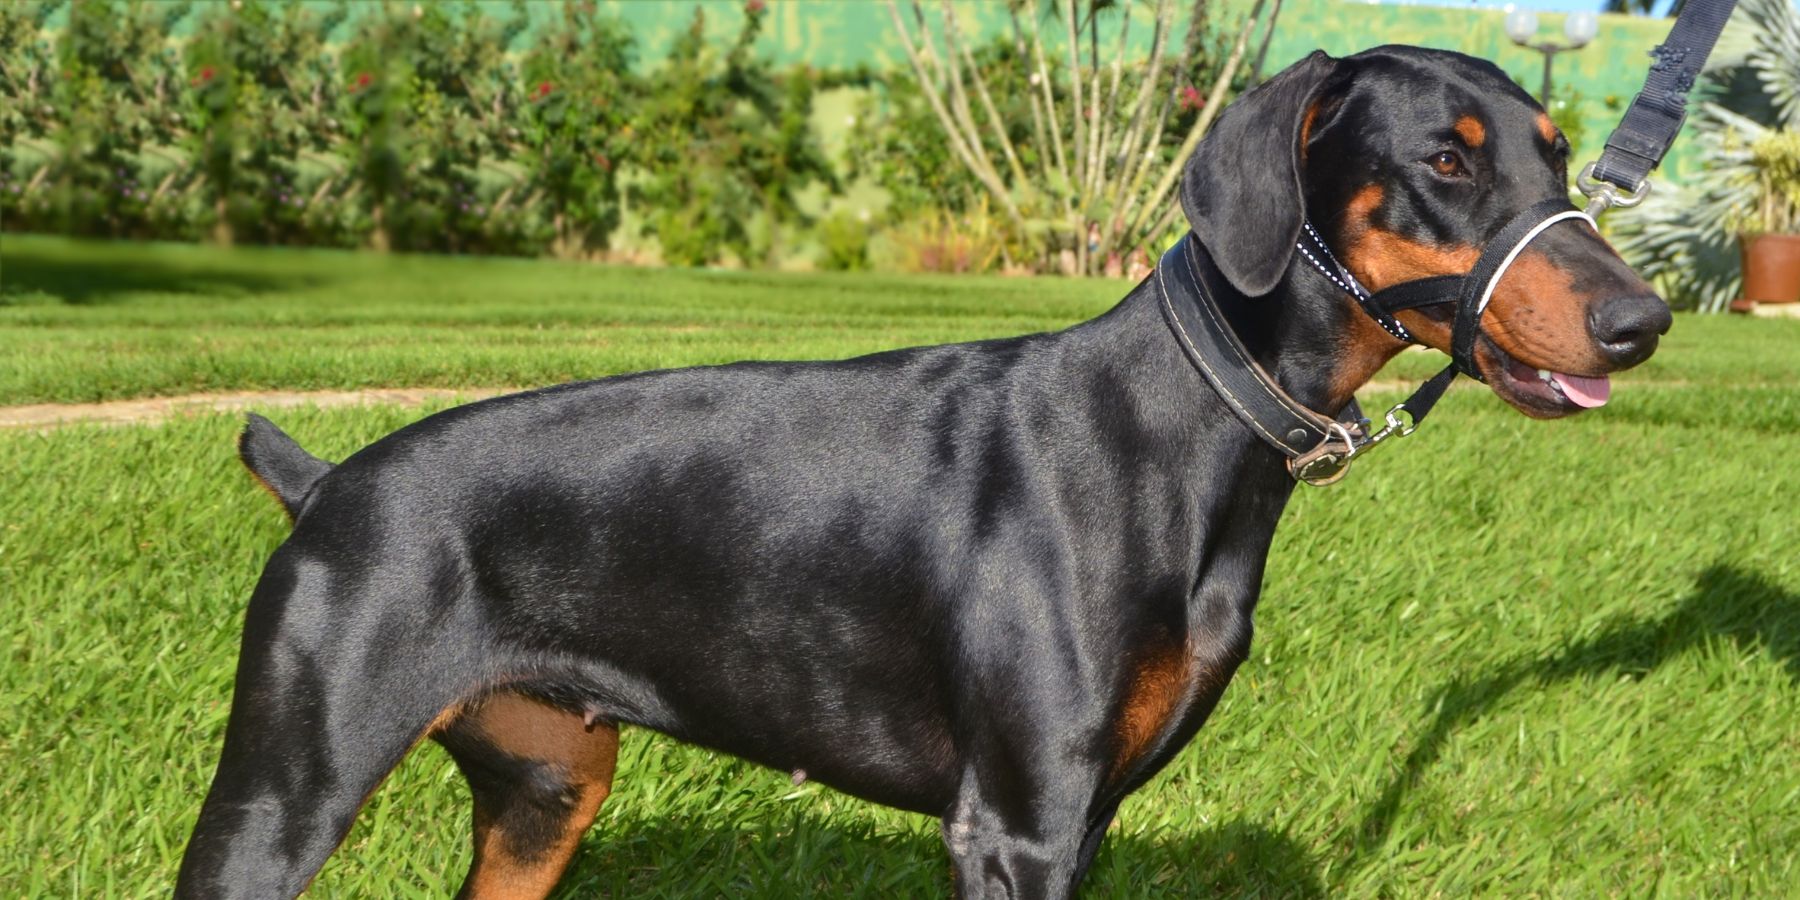
Hello, fellow dog lovers! If you're reading this, you're probably looking for a way to make walks with your furry friend more enjoyable and less of a tug-of-war. Well, you're in the right place. I've been exactly where you are, and I want to share my journey in training my dog with a head halter. It's a simple tool that can make a big difference, and I'm here to guide you through each step.
1. Understanding the Head Halter
Step 1: What is a Head Halter?
A head halter is a training tool that consists of straps around a dog's nose and neck. The design gives you more control over your dog’s head and, consequently, their direction of movement. It’s different from traditional collars and even harnesses, which control the body.
Step 2: Why Use a Head Halter?
The head halter is beneficial for dogs that pull, lunge or get easily distracted. It offers a gentle way to guide them without causing strain on their neck or back, unlike some collars or harnesses.
2. Choosing the Right Head Halter
Step 3: Finding the Perfect Fit
Just like harnesses, the fit is crucial. Ensure the halter fits snugly around the back of the head and allows your dog to open its mouth comfortably. A poorly fitted halter can be ineffective or even harmful.
Step 4: Introducing the Halter to Your Dog
Before using it on a walk, let your dog get familiar with the halter. Place it near their food bowl or play area, or gently hold it against their face without fastening it. The goal is to create a positive association.
3. Training with the Head Halter
Step 5: Start with Short Sessions
Begin by putting the halter on for short periods around the house. Reward your dog with treats and praise to associate the halter with positive experiences.
Step 6: Gradual Introduction
Gradually increase the time your dog wears the halter. Ensure they're comfortable and not showing signs of distress or discomfort.
4. Going for Walks
Step 7: First Walk with the Halter
Choose a quiet, familiar environment for your first walk with the head halter. This helps minimize distractions and stress for your dog.
Step 8: Gentle Guidance
When walking, use gentle tugs and redirections. The aim is not to pull your dog around but to guide them. Remember, the head halter is a tool for communication, not control.
5. Troubleshooting Common Issues
Step 9: If Your Dog Tries to Remove the Halter
Some dogs might try to paw at the halter or rub their face against you to remove it. Stay calm and redirect their attention with treats or commands.
Step 10: Adjusting to the Halter
Be patient. Some dogs adjust quickly, while others take time. Don’t rush the process and be consistent with your training.
6. Transitioning
from the Halter
Step 11: Mix It Up
Once your dog is comfortable with the halter, start mixing in walks using their regular collar or harness. This helps your dog understand that good walking behavior is expected, regardless of the equipment.
Step 12: Gradual Weaning
Gradually reduce the use of the head halter over time, especially as your dog's walking behavior improves. The goal is for your dog to walk nicely with or without the halter.
7. Enjoying the Benefits
Step 13: Celebrate the Progress
Acknowledge and celebrate the progress you and your dog have made. Training can be a bonding experience and significantly improve your walks.
Step 14: Keep Practicing
Even after your dog has mastered walking with the head halter, regular practice is important. Keep reinforcing positive behavior with occasional halter walks.
Conclusion
Training your dog with a head halter can be a rewarding experience. It's all about patience, consistency, and understanding your dog’s needs. Remember, every dog is different, and what works for one might not work for another. Be adaptable, and don't hesitate to seek advice from a professional trainer if needed.
I'd love to hear about your experiences with head halter training! Share your stories and tips in the comments below. Let's help each other create happier, stress-free walks with our beloved dogs!


